Category: Homemaking

No Paycheck

Money is so big in our world. Our lives revolve around it on some level, whether we want them to or not. Everything we do, eat, or use costs money, and therefore our lives are tightly tied to making and spending it.

As a stay-at-home mom, I’m obviously not paid. I don’t make any money to contribute to our family. Living in a money-driven society, being an unpaid worker is hard. Yes, I chose to have children and yes, I choose to stay home with them. Are those choices contributive to society? Yes, I sure think so!

Without children being brought into the world, the human race would die out. There are also benefits of having a stay-at-home parent for a child’s development, and regardless, a child who stays home with a parent is not using an outside resource for childcare, which leaves those resources available for others who need them.

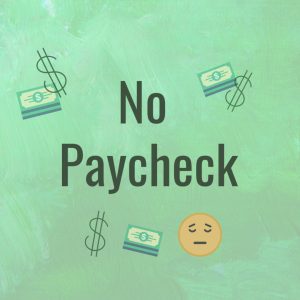
But according to my non-existent paycheck, my work is worth zero dollars.

At times, it can be hard to not internalize this.

One thing that makes it even harder to believe in my value as a stay-at-home mom is the pressure to make money from home. SAHMs (stay-at-home moms) are frequently presented with opportunities to convert to WAHMs (work-at-home moms) by “making money from home.”

There are a seemingly unlimited number of businesses geared towards SAHMs, such as selling kitchen tools, clothing, cleaning products, essential oils, specialty skin care products, e-books, and more. There’s also blogging, life-coaching, virtual assistance, book-keeping, tutoring, and providing childcare to other children alongside your own. I have tried and failed to make money doing several of these things! And I’ve known many moms who have spent a lot of time and money investing in businesses like these, only to end up closing them because they don’t make enough money to cover expenses.

Many of these business models are actually predatory, designed to make most of their profit from the “momtrepreneur’s” startup costs, rather than their actual products. They basically know that most WAHMs won’t end up with a profitable long-term business, but they sell the idea of making money from home to moms who already feel undervalued by society. Diabolical!

Of course, we SAHMs constantly fall for it. I constantly find myself feeling the urge to make money, feeling distressed by the fact that I can’t, and then reminding myself that it’s okay because that’s not where my value comes from.

Societally, my value comes from what I contribute, which right now includes raising children who are healthy and capable and have good values, supporting my church by giving my time and managing my family’s tithing, helping families in crisis through the ministry Safe Families for Children, writing, providing a home and care for animals, and contributing to the economy by buying things my family needs and wants (with my husband’s income of course).

But beyond what society thinks, or how I contribute, I have an even deeper value, and that comes from God. Whether I lift a single finger in life or not, God sees me as priceless. He doesn’t value me for how hard I work or how much I contribute, and he certainly doesn’t value me based on how much money I make.

God calls me priceless because I am his creation, his daughter, and bought with the price of his son Jesus. He calls me valuable and gives me a job that is immensely more important than making money or “contributing” to the world I live in; that is sharing the love of Jesus with those around me and living my life to glorify him. I can do my part to help God’s family continue to grow and point more people towards Jesus, so they can have an eternity with Him in Heaven.

Ultimately it comes down to a choice. Do I want to have an earthly perspective and focus on making money and chasing “happiness” in this life? Or, do I want to have an eternal perspective and focus on living out my mission for God, and finding my joy in the Lord?

The truth is, I do care about having a nice life. It’s human nature to want that. I want that for myself and for my husband and for my kids. I don’t think that it’s wrong to want that, or to work for that. I am thankful that my husband has a great job and can support us comfortably, and I can afford to stay at home with my kids. But whenever I start to feel my money-driven-nature creeping in, I strive to remember that money isn’t where my value comes from, and contentment is so much more valuable than more income anyway.

As a stay-at-home mom, I would love to have a paycheck that reflects my value. But that isn’t the world we live in. Maybe someday it will be, but for now, at least I know that what I do is important, paycheck or not.

Recipe of the Month – Chicken Dumpling Stew

This recipe is for one of the most taste-bud-pleasing, comforting, and easy recipes in my cook book. It uses a lot of “cheat” ingredients, which is one reason it’s so easy. It also uses a slow cooker, which usually means a low-involvement dinner that basically cooks itself. What’s not to love?


Servings: about 6

Prep Time: 5 mins

Cook Time: 5 hrs


Ingredients:

4 skinless boneless chicken thighs

2 tbsp salted butter

1 can cream of mushroom soup (condensed, 10.5 oz)

1 can cream of chicken soup (condensed, 10.5 oz)

1/2 carton chicken broth (16 oz)

1 bag frozen mixed veggies (16 oz)

1 bag frozen diced onions (12 oz)

Seasoned salt

Pepper

Dry parsley (optional)

1 can biscuits


Instructions:

Place chicken thighs in slow cooker along with everything but the biscuits: butter, cream of mushroom soup, cream of chicken soup, chicken broth, mixed veggies, onions, salt, pepper, and parsley. Stir to mix somewhat – but it doesn’t have to be perfectly combined at this point. Cover and cook on high for 4 hours.

chicken-dumpling-stew-in-pot

Tear biscuits into small pieces and drop into stew. Continue to cook on high for 1 hour, or until chicken reaches internal temperature of 165 and biscuits are cooked through. Use two forks to tear chicken into smaller pieces. Serve and enjoy!

chicken-dumpling-stew-bowl

Notes:

The measurements for the ingredients are based on what was available at my grocery store. If you have a bag of mixed veggies or onions or canned ingredients that are slightly bigger or smaller, don’t worry about it, just toss it in. The stew will still be delicious!

Chicken thighs sometimes aren’t available as boneless and skinless. In that case, it will take a little bit more work to separate the skin and bones from the meat. You can carefully cut off the skin first, and then cut chunks of meat away from the bone, and toss them into the slow cooker just like that. Either way, don’t worry about cutting them up before cooking, because it’s super easy to shred those pieces after they’re cooked. Just probe around with two forks and tear up any big chunks you find, before serving.

Almost all of these ingredients can be purchased organic, or you can prepare them yourself if you prefer. Mixed veggies can be prepared with fresh produce by mixing peas, corn, chopped baby green beans, and thin chopped carrots. You can dice fresh onions. Even cream of chicken soup, cream of mushroom soup, and chicken broth can be made from scratch, if you prefer. And of course, buttermilk biscuits can be made by hand as well. I like to use shortcuts when possible, but you can make this recipe as “from scratch” as you’d like! Recipes for all of those things can be found easily online.

Recipe of the Month – Creamy Eggnog

rotm-creamy-eggnog
This recipe is for delicious, creamy eggnog–a perfect holiday treat! I created this recipe to fit my idea of a perfect eggnog. Three unique features of this recipe are that the eggs are cooked for safety, the whole eggs are used rather than just the yolks, and there is no alcohol included. These are my preferences, but the recipe can be adapted if yours are different! See the notes at the bottom for more details.

Servings: 8 cups (½ gallon)
Total Time: 35 minutes to prepare + 2 hours or so to cool

Ingredients:
6 eggs
6 cups half and half
3/4 cup sugar
Pinch of salt
1 tsp vanilla
1/2 tsp nutmeg
1/2 tsp cinnamon

Instructions:
Beat eggs with an immersion blender* or electric mixer until smooth and well combined. Add half and half, and blend well. Pour into a nonstick pot and heat over low, stirring frequently.

img_20161212_184803

Cook until the mixture reaches 160° F. Remove to a bowl, and add the sugar, salt, vanilla, nutmeg, and cinnamon. Beat together with an immersion blender* or electric mixer on medium high for 2 minutes, until everything is smoothly combined.

img_20161212_193704

Cover the bowl and put it in the fridge or freezer to cool completely. Once cooled, taste test, and add more sugar or spices to taste if desired. You can give it another whirl with the blender or mixer for extra smoothness. Pour into mason jars, a pitcher, or a punch bowl and refrigerate or serve immediately.

img_20161212_194039

Notes:

Most eggnog recipes call for using the yolks only, and using them raw. Or, you might find recipes that use beaten egg whites as a topping for the eggnog. I have tried those methods and found that I can’t tell the difference, taste-wise. And since I prefer to cook the eggs for safety, and I’d rather get more use from the eggs, I don’t separate them. I think this nog is pretty delicious despite being “non-traditional.” However, if you prefer to separate your eggs, you can do so. In that case, you might cook the yolks with the half and half, or just use them raw and skip the cooking step. The whites can be beaten to stiff peaks and folded in at the end, or left out entirely.

I use half and half because I think it’s easiest, and has a good creamy texture without being too heavy. An alternative option is to use 3 cups whipping cream and 3 cups whole milk, instead of the 6 cups half and half. Personally, heavy whipping cream tastes too “greasy” to me, which is why I prefer regular whipping cream, the slightly less fatty version. Ultimately, the goal is to get a mixture that is about half cream and half milk.

*I recommend using an immersion blender or a regular blender, rather than an electric mixer. The blades of a blender do a much better job of pulverizing any egg chunks that might be in there. Personally, I really dislike egg chunks in my eggnog. Blegh! In the picture you can see I was using an electric mixer, but later I had to use the immersion blender because I discovered some unwanted chunks during the taste test.

When you are cooking the eggs, cream, and milk, make sure to stir very frequently and keep a very close eye on it. The eggs can quickly start to solidify if it gets too hot or isn’t stirred enough. If this happens and you catch it right away, you can remove it from the heat immediately and blend the small amount of cooked egg back in. However, if you don’t catch it quick enough, you will have a big pot of fluffy scrambled egg. I may or may not know this from experience… and I may or may not have turned it into a quiche to avoid wasting it. That quiche may or may not have been delicious. 😉

img_20161212_202507
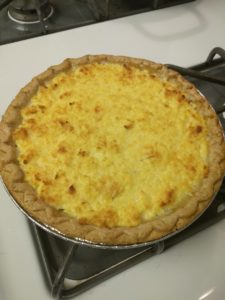
When life gives you ruined eggnog, you make a quiche.

If you’d like to add alcohol to your eggnog, you can take away some of the milk and cream to compensate. Try to keep the overall liquid content the same to avoid an overly thick or thin eggnog.

To avoid having your eggnog go bad, I’d recommend drinking it within the time you’d want to finish an opened carton of milk, about a week. Since the eggs are cooked, you don’t need to worry about using it up within a day or two. Although, let’s be honest, that might happen anyway!

Someone’s in the Kitchen…

download


When Cory and I first moved to our own place together, cooking became a hobby of mine. Growing up, my dad taught me the basics of cooking and gave me a foundation of confidence in the kitchen. Then I became responsible for feeding myself and my husband, and my interest and skills grew. Cooking for just the two of us, I enjoyed making elaborate dishes with tons of fresh ingredients, and trying new things.

When we had Cody, cooking went on the back burner (hehe, pun). We had about three months’ worth of dinners in our freezer, which I prepared before Cody’s birth, and that helped a lot. But once that food ran out, we started eating a lot of convenience foods that required minimal cooking, and we ate out often. Our food budget really started to suffer.

In the past year, we’ve finally started to find a balance between spending less time and energy, and still eating healthy and economically. One of the key components that makes my system work is my collection of recipes that are easy, quick, and that I know my family enjoys. The other key component is meal planning.

Cooking dinner at home most nights has saved us a lot of money, and allowed us to finally stay within our food budget. It’s also reignited my love for cooking. I’m again enjoying learning to cook new things,  and since I abandoned my vegetarian diet during my pregnancy, I have even more choices for cooking than I used to. I also love to experiment and make recipes my own!

One of my favorite aspects of cooking is sharing delicious food with others. While I may not be able to send food through the internet, I can share recipes. And as part of my recent blog “re-launch,” I’m going to be sharing a recipe every month! I hope you enjoy cooking some of them for yourself.

But I want to use the rest of this post to share my thoughts on the importance of meal planning. It helps us stay within our budget for food, saves time and energy, and helps us eat healthier and more balanced diets. I highly recommend it!

For us, meal planning only includes dinners. We eat the same few things for breakfast most days, and lunches are either leftovers from dinner, or things like sandwiches or bagels. Snacks are also unplanned, but we keep our kitchen stocked with our favorite healthy munchables.

Meal planning is a simple process for me. I plan out our dinners for the week on the same night every week, and make my grocery list at the same time. Some families plan out their meals for longer periods of time such as two weeks or even a month. For us, planning a week at a time works best.

My dinner planning session doesn’t usually take long, maybe 15 minutes or so. I start by looking at the calendar and taking note of nights we may need to eat a fast dinner. I write down the evening activities we have planned for each night of the week in my weekly planner, so it’s easy to visualize the entire week. I also write down my dinner list as I’m creating it, in the same planner, off to the side.

I start making my dinner list by checking out what we have in the fridge and pantry that needs to be used up soon, and plan a few meals using those things. I make a note next to the meals with time-sensitive ingredients, to make them earlier in the week. I also make a note next to meals that are fast and easy, to reserve them for busier nights of the week.

Then I look at other food we have that could be used for dinners, including frozen foods, and dry or canned foods in our pantry. Sometimes, we might have several dinners in our freezer because I make big batches of things on weekends that aren’t too busy. Finally, I choose a few meals from my “Dinner Master List,” to complete the week. Any meals that include fish or meat are designated for one of our grocery days (we have a big shopping trip on Monday, and a smaller mid-week grocery trip to pick up some favorite items from a specialty store). We also often plan to eat out one night of the week. Between all of these sources for dinner options, we can usually vary our meals quite a bit and we don’t have to repeat dinners more than once a month unless we want to.

The biggest tool in this process, other than my weekly planner, is my Dinner Master List. This is a list of all the dinners we like to eat, categorized by type of food, ease of preparing, and time required. It’s definitely one of my favorite organizational tools that I have created! I’m planning to share an editable copy of my dinner master list here on my blog soon, so stay tuned for that.

After planning my dinners for the week, I make my grocery list. I look at the recipes and double check every ingredient to make sure I don’t miss anything. I also add our regular breakfast, lunch, and snack foods onto my grocery list. Then when I go shopping, I follow my list! This is important for the money-saving aspect of meal planning. I’ve also chosen my grocery store based on their selection and prices, so that helps with the budget as well!

For the rest of the week, it’s as easy as choosing a meal from the list each night to cook. Some nights, we end up needing to change plans and we push a meal or two to the next week. It’s flexible!

There are definitely many benefits to meal planning, and I know I’d have a hard time feeding my family if I didn’t plan ahead.

Do you like to cook? What do you think about meal planning? Share your thoughts in the comments below!

My Top 10 Kitchen Essentials

In this post, I’m sharing the 10 most important, and frequently used products in my kitchen. These are all products I own and love, with the exception of two which are currently on my wishlist.

1. Nonstick cookware

Pots and pans are obviously a necessity for cooking. But what you might not think about are the reasons to choose either nonstick, stainless steel, or some other material. When my husband and I got married, we registered for a stainless steel set, which we were blessed to receive as a wedding gift. We thought that it was a good idea because stainless steel is more durable and we expected it to last forever. Well, it very well may last forever, but that doesn’t actually sound appealing since I discovered how difficult it is to cook with! Everything sticks, and you have to cook with a lot of oil and high heat to help reduce the sticking. When we switched to nonstick, I discovered how easy and wonderful it is to be able to cook potatoes and eggs and meat and anything really, all without sticking! Cleanup is super easy, too. This set in particular is really well made, looks nice, and comes with a reasonable price tag. We have the dutch oven that matches this set (but doesn’t come with it), and I plan to buy this set for my family (really myself, haha) for Christmas.

2. Silicone utensils

When you have nonstick cookware, you want to avoid metal cooking utensils. This set of silicone utensils are my favorite to use. That spatula spoon is the best! And the ladle is so much easier to use than a hard plastic one because you can really “scrape” the bottom of the pot and scoop up whatever you’re ladling. This set is a great price for five utensils, and it comes in red, gray, or teal.

3. A thin turner

The only thing I don’t like about silicone utensils is that they are chunky. The spatula is good for flipping things in the oven or flipping meat, but it’s really too thick to handle pancakes well. That’s why I bought this, and it works perfectly for flipping more fragile foods.

4. A good knife set

We have this set, minus the smaller santoku knife, which didn’t come with our set (purchased elsewhere, before I discovered the joy of Amazon.) These knives are sharp, durable, look nice, and come with a knife block for storage. We hand wash ours rather than tossing them in the dishwasher, and as a result they have held up very well. I don’t see us needing to replace them for many years, if ever.

5. Measuring cups

These measuring cups are great because they have little magnets in the handles which keep them together and organized in the drawer. They’re metal, meaning more durable than plastic, and they have the measurement markings etched into the handles. I bought these to replace my plastic measuring cups when the ink smudged away after a couple of years going through the dishwasher. These have held up much better.

6. Measuring spoons

And of course, if you want your measuring spoons to match your measuring cups, then you should get these too! Did I mention how cool those magnets are? My measuring spoons are always neatly stacked in the drawer, and it takes almost no effort to keep them that way. It makes it easier to find exactly the spoon I need without digging around.

7. Measuring cups

These glass measuring cups are awesome for when you need to measure larger amounts of things, or when you’re measuring liquids and you don’t want to spill. I use the largest one for making pancakes, and it’s super easy to pour the batter onto the griddle with the built in spout. The smallest one comes in handy for making buttermilk, to add to the pancakes, too. (I do cook things other than pancakes, by the way, even though this post is oddly pancake-centered.)

8. Cutting boards

I currently have a mismatched set of cutting boards, two of which are on their last legs. I’d really like to replace them with these! While bamboo was appealing to me when I was first starting out building my own kitchen tool set, I have now learned that plastic is preferable. Bamboo doesn’t hold up in the dishwasher very well, and it can’t be sanitized as thoroughly as plastic. On the other hand, a cutting board made of cheap plastic isn’t going to hold up very well either. These ones have great reviews, so I’m hoping they’re durable and well-made. I also highly recommend a set of cutting boards with nonslip feet (like these), because it can be difficult to cut on a board that’s slipping around the counter!

9. Rice cooker

I have no idea why it took me so long to buy a rice cooker. For years I struggled to make the perfect rice in a pot. Why, oh why? Rice cookers are awesome, and this one does its job well and has a great price. I use mine about once a week! If you take a minute to get your rice started earlier in the day, it saves time when you need to cook dinner. This one has a “keep warm” function, so I can make the rice hours ahead of time. It’s also nonstick, which makes it ridiculously easy to clean.

10. Food thermometer

If you cook meat, then investing in a food thermometer is a must (and it’s really not much of an investment)! Checking that your meat is cooked to the proper temperature prevents food poisoning, and it’s quick and easy to do. I always check my meat, ever since the Westropp hamburger fiasco of 2014. (What, you haven’t heard of this historical event? How strange.) Seriously though, a food thermometer is a must. It’s also important for making yogurt at home, if that’s something you’re interested in.

So there you have it! I’ve given you a glimpse into my kitchen, and the tools I use most.
What about you? What are your favorite kitchen essentials?

Recipe of the Month – Chicken Coconut Curry

Welcome to my new recipe of the month! This is a new idea I’m trying, to share my love of cooking with the world. I hope you enjoy the recipes I post here, which are designed to be reasonably easy, quick, nutritionally balanced, and of course, delicious. If you try a recipe out, please leave comments on the post with your experience. I’d love to know how it worked out for you!

This recipe is for a tasty, easy dish that my family enjoys. We aren’t huge fans of Indian food, but we don’t hate it either. I think this meal would be enjoyed by lovers of Indian food and picky eaters alike, because it’s mild while still being flavorful.

Servings: 2 (double the recipe for more servings!)
Total Time: 30 minutes

Ingredients:
Chicken breast, 1 large or 2 medium
1 carrot
1 small bunch spring onions
3 tbsp curry paste
About ⅓ cup coconut milk (more for a creamier dish, less for a stronger curry flavor)
1 cup rice, uncooked
½ cup peas, fresh or frozen
Olive oil
Salt and pepper to taste
Fresh cilantro leaves, if desired

Notes:
I sometimes like to prep for the meals I plan to cook in the week, on the day I go grocery shopping if possible. Getting all of the chopping, marinating, and slow cooking processes (like steaming rice) out of the way all at once makes it super quick and easy to cook dinner every night.

The curry paste I use is found in my grocery store in the aisle with Asian foods, which is also where the coconut milk is. Curry paste can be found in varying degrees of spiciness and with different flavors added, too. I use mild, which has plenty of flavor for my family. The coconut milk I use for cooking comes in a small can, and is very creamy and delicious. This recipe doesn’t use the whole can, and the leftover can be saved and used for other recipes.

img_20161104_185907


I always take the temperature of meats when I’m cooking, because things like color, juices, or even the amount of time cooking aren’t always accurate or consistent ways of knowing when the meat is done. All it took was one case of food poisoning to convince us to adopt this practice! Food thermometers are not expensive, and it only takes a minute to check. You can download a free printable document with safe cooking temperatures for different types of meat here! It also has information on safe food handling practices in general.

Prep:
Cook the rice.
Cut the chicken breast into bite-size pieces.
Wash and cut the ends off of the carrot, then slice it into thin slices.
Wash and cut the ends from the top and bottom of the spring onion, then cut the green stalks into thin slices, and roughly dice the bulb part.

Cooking:
In a large pan, heat about a tablespoon of olive oil. Season the chicken with salt and pepper, then add it to the pan. Dump in the carrots and onion as well. Stir, cover, and cook for 2-3 minutes. Stir again, and cover. Covering the pan helps the food cook faster and the veggies become more tender.

img_20161104_190147


Add the curry paste and coconut milk* to the pan and stir it well to combine. Lower the heat, cover, and let it simmer for another few minutes.

*Coconut milk separates naturally, so if you’re not using an entire can, be sure to stir it first before measuring or scooping out the amount you’re going to use!

img_20161104_190831


(Indian food isn’t exactly photogenic, now is it? But I promise it tastes good!)


Meanwhile, heat the peas, then add the rice, stir, and heat until it’s all nice and warm.

img_20161104_191616


Check the temperature of the chicken with a food thermometer, to ensure it has reached at least 165 degrees Fahrenheit. Serve the rice with peas next to the chicken curry, and top with fresh, (washed), torn cilantro leaves, if so desired.

img_20161104_192525

Enjoy your dinner!